
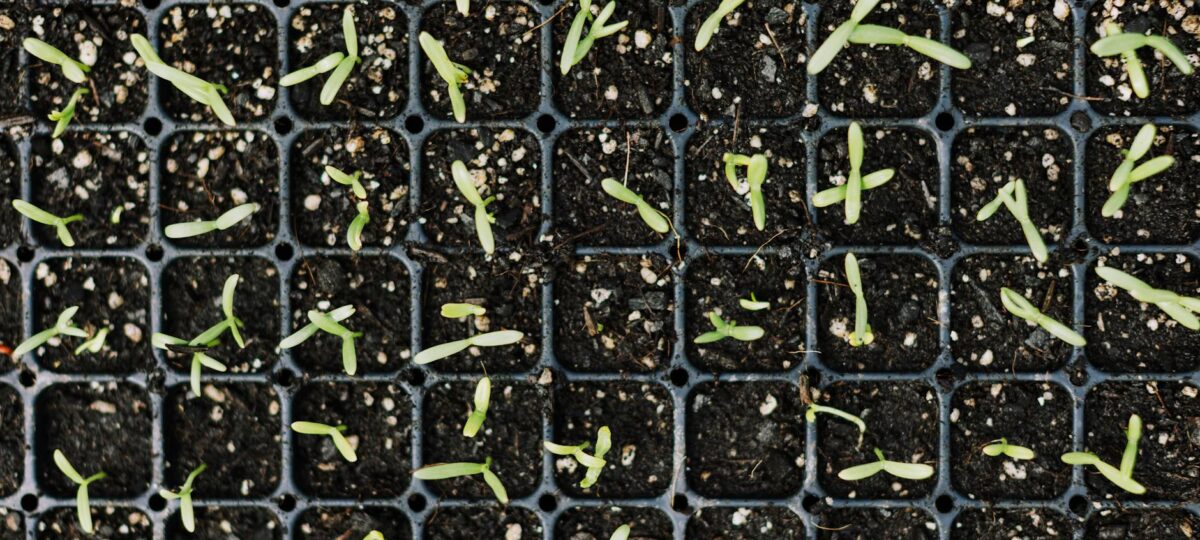
Sowing seeds indoors is one of the most satisfying things you can do as a gardener in late winter and early spring. While the garden outside is cold and bare, you’re already two months ahead — coaxing tomatoes into life on a windowsill, watching chilli seedlings uncurl, filling a propagator with the first green of the year. Done well, indoor sowing extends the growing season significantly and gives you crops you couldn’t reliably grow otherwise in the British climate.
Here’s everything you need to get it right.
Why Sow Indoors?
Some crops simply need a longer growing season than a British spring allows if sown direct outdoors. Tomatoes, for example, need around 60–80 days from planting out to first harvest — sow in March, plant out in May, and they’re producing by July. Direct sown outdoors in May, they’d barely ripen before the frosts returned. Chillies, aubergines, celery, and celeriac all have similarly long seasons and need the head start that indoor sowing provides.
Other crops benefit from indoor sowing simply because young seedlings are more vulnerable than established transplants — brassicas planted out as 15cm-tall robust seedlings are far less likely to be slug-eaten or eaten by pigeons than seeds direct-sown in the open.
What You Need
Seed Compost
Use proper seed compost, not multipurpose. Seed compost is finer-textured, lower in nutrients (which young roots don’t need and high levels can actually harm), and designed to allow delicate roots to penetrate easily. Multipurpose compost works in a pinch but often causes compaction and drainage problems at the seedling stage. John Innes Seed Compost or a good peat-free equivalent are both reliable.
Containers
Seed trays for things that will be pricked out (tomatoes, celery, leeks sown densely). Module trays (cell trays) for things that dislike root disturbance — courgettes, squash, sweetcorn, beans — where each seed gets its own cell and the entire root ball transplants undisturbed. Small pots (7–9cm) for large seeds or things that establish quickly. Whatever you use, make sure it has drainage holes and wash it between uses to prevent damping off disease.
Warmth
Most vegetable seeds germinate best at 18–22°C. The airing cupboard works for germination (check daily — remove to light the moment seedlings emerge). A heated propagator gives consistent bottom heat and is genuinely useful if you sow a lot. A warm windowsill — south-facing if possible — handles most things adequately. Chillies and aubergines prefer 25°C+ to germinate well and really benefit from a propagator.
Light
Once germinated, seedlings need as much light as possible. A south-facing windowsill is good; a grow light is better for crops started very early (January, February) when natural light is limited. Insufficient light produces leggy, weak seedlings that are slow to recover when planted out. Turn seed trays regularly on windowsills to prevent seedlings leaning towards the light.
Step-by-Step: Sowing in Trays
- Fill the seed tray with moist seed compost to within 1cm of the top. Firm lightly — not hard — with the base of another tray or a piece of board.
- Sow seeds thinly across the surface. Overcrowding leads to poor germination, leggy seedlings, and damping off. For small seeds, fold a piece of paper into a V, put seeds in the fold, and tap gently to distribute evenly.
- Cover with a thin layer of vermiculite or sieved compost — roughly to the depth of the seed itself. Some seeds (celery, snapdragon) need light to germinate and should not be covered at all; check the seed packet.
- Label the tray straight away with the variety and the date sown. You won’t remember a week later, and the date tells you when a slow germinator is worth giving up on.
- Water gently — a fine-rosed watering can or mist sprayer avoids disturbing seeds. Alternatively, stand the tray in a tray of water and let it absorb from the base until the surface looks moist.
- Cover with a clear propagator lid or a piece of cling film to retain moisture, and move to warmth. Remove the cover as soon as germination begins.
- Move immediately to the lightest spot available once seedlings emerge.
Pricking Out
When seedlings in trays have developed their first true leaves (the second pair of leaves, which look like miniature versions of the adult leaf rather than the seed leaves), they’re ready to prick out into individual modules or small pots. Handle them only by the leaves — never the stem, which is easily crushed. Use a pencil or dibber to ease roots free of the compost without tearing them.
Plant each seedling into its new container so that the seed leaves sit just above the compost surface. Firm gently, water in, and keep in good light. Don’t prick out into rich compost — a general-purpose or young plant compost is better than a high-nutrient mix at this stage.
Common Problems
- Damping off — seedlings collapse at soil level and die. Caused by fungal disease; prevention is better than cure. Use clean trays, fresh compost, don’t overwater, ensure good air circulation, and don’t sow too densely.
- Leggy seedlings — long, thin, weak growth caused by insufficient light. Move to a brighter spot or use a grow light. Tomatoes can be planted deeper than they grew (the buried stem produces roots) to compensate.
- Failure to germinate — most often caused by old seed (test viability by germinating a few seeds on damp kitchen paper before committing to a full sowing), insufficient warmth, or compost that’s too wet or too dry.
- Root-bound seedlings — seedlings left too long in small containers become stressed and check badly when transplanted. Pot on promptly when roots reach the bottom of the container.
When to Sow What
Timing varies by crop and by how much growing space (and light) you have available. A rough guide for UK indoor sowings:
- January–February: Chillies, aubergines, onions from seed, early celery
- March: Tomatoes, leeks, sweet peas, celeriac, early brassicas
- April: Courgettes, squash, sweetcorn, cucumbers, beans, brassica transplants
- May: Anything still to sow; most things can now also go direct outside
Starting in January: Keep It Small
January sowings are for the slowest crops: chillies, peppers and aubergines, which need a long season. Germinating them needs warmth (a heated propagator helps most here), and a January windowsill gives far less light than it looks, so the seedlings can stretch by March. Rotate the trays daily, and open lids for a few minutes each day once seedlings are up to keep air moving.
The common January mistake is doing too much too soon. One tray of chillies, perhaps with a tray of microgreens or a pot of parsley for something quick, is plenty; most other sowings are better left until March, when the light improves. The same goes for tomatoes: a mid-March sowing on a bright windowsill usually makes stronger plants by May than an early-February one on a dim sill, because light matters more than the extra weeks.
Sowing Direct Outside
Not everything needs a windowsill. Outdoors, soil temperature matters more than the date: seed sown into cold, wet ground tends to rot or sit there. Allow two to three weeks later in Scotland and the north of England.
- From March: broad beans and peas, which cope with cold soil (on an exposed site, broad beans can be started in modules and planted out as sturdy plugs); onion sets.
- From March onwards, little and often: salad leaves, a short row every two to three weeks for a steady supply rather than one glut.
- April: beetroot and carrots, once the soil has warmed. Sow carrots thinly where they are to grow and thin them later; they don’t transplant.
Hardening Off and Planting Out
Seedlings raised indoors are soft, and planting them straight out into wind and sun can stall or kill them. Harden them off over seven to ten days: an hour outside in a sheltered spot on the first day, a little longer each day after, out all day by about day seven, and out overnight by day ten if no frost is forecast. A sheltered, sunny wall is a good place to do it. It is the step most often rushed, and the one that costs most when it goes wrong.
Tender crops (tomatoes, courgettes, squash, French and runner beans, sweetcorn, basil) should not go out until the risk of frost has passed: usually mid- to late May across much of the UK, later in the north and in frost pockets. Waiting won’t hurt them; a frost will.
Protecting Young Seedlings
Seedlings are at their most vulnerable in their first few weeks outside. Most losses come from slugs, birds and late frost, so cover those first:
- Slugs and snails: the biggest threat. Go out with a torch after dark, especially after rain, and pick them off; it finds far more than a morning check. Clear debris and boards that give them daytime shelter, and keep young transplants well watched until they are big enough to lose a leaf. Nematodes watered onto damp soil are a chemical-free option once the soil is above about 5°C. Pellets, traps and barriers are covered in organic slug control below.
- Pigeons: net brassicas the day you plant them, on canes or hoops so the net doesn’t touch the leaves, and cover young peas and beans with fleece until they are sturdier.
- Late frost: keep horticultural fleece to hand through March, April and May and put it over seedlings whenever a frost is forecast, taking it off by day where you can. A light fleece is enough for a light frost; a heavier 30gsm one copes with longer cold spells. Our horticultural fleece guide covers weights and uses.
- Flea beetle: the tiny holes in young brassica leaves. Fine insect mesh keeps it out better than fleece; leave it on until the plants are well established.
Organic Slug Control: What Works
Metaldehyde slug pellets have been banned for outdoor use in the UK since April 2022, so the old blue pellets are no longer an option. No single method replaces them; a combination, kept up through spring, does the job. Roughly in order of how reliable they are:
- Ferric phosphate pellets: the closest replacement, and approved for organic growing. Scatter them thinly around transplants in the evening (a few pellets, not a carpet) and top up after heavy rain. Slugs that eat them stop feeding and die below ground.
- Slug nematodes: microscopic worms that occur naturally in UK soil, sold to mix with water and drench onto moist soil above about 5°C. They work underground, take two to three weeks to build up and protect a bed for around six weeks, so a second dose in late summer helps where slugs are bad year after year. They are living organisms with a use-by date: check the storage instructions before ordering.
- Copper tape: a modest but real barrier on pots and raised-bed rims, where you can make an unbroken ring. Overlap the joins tightly and keep it free of soil; it does nothing about slugs already living in the bed.
- Beer traps: a jar or yoghurt pot sunk so the rim sits just above soil level (set flush, it also catches ground beetles, which eat slugs), filled with cheap beer and emptied every few days. More useful for gauging how bad things are than for control, but a few around courgettes and brassica transplants do thin the numbers.
Crushed egg shells, coffee grounds and grit are folklore more than control. Egg shells add a little calcium but won’t stop a determined slug, coffee grounds would be needed in quantities few kitchens produce, and grit loses most of its effect as soon as it rains. Use them as extras at most.
The long game is predators. Hedgehogs, frogs, toads, ground beetles and slow worms all eat slugs, and an untidied corner with a log pile or leaf litter, plus a small pond or even a sunken tray of water, gives them somewhere to live. It takes a few seasons to show, and it is one more reason to use ferric phosphate and nematodes rather than anything harsher. You won’t get rid of slugs altogether; the aim is to cut the pressure enough that young plants get away.
For what to do with seedlings once they’re established, see our guide to hardening off plants — the crucial step before moving them outside. And for month-by-month sowing schedules, see our March, April, and May garden jobs guides. Full spring growing content in the Spring Garden hub.
You’ll find more growing guides and seasonal advice in our Garden & Outdoor.
Last reviewed: April 2026
📋 From the D&L Shop: Planning your growing year? Our Your First Year on the Allotment guide covers every month from clearing the plot to your first proper harvest — written from 15+ years of UK growing experience. £9.99, instant PDF download. Also useful: the Allotment Plot Planner (£4.99) for mapping beds and planning crop rotation. Browse the full shop →
🛡 Our standards: How we research · Editorial policy · Affiliate disclosure · Corrections · Last reviewed: April 2026

About Gareth
Gareth Isherwood is the editor of Danbury & Lovejoy. He has baked bread at home for 25+ years and has 15 years of growing experience across gardens, containers and other growing spaces, including an East Sussex allotment for the past three years. Read his full story →
Was this useful?