Disclosure: VeSync, the company behind Cosori, sent us the Cosori Double Stack air fryer used in this recipe free of charge for review. We paid nothing for it. We earn a commission if you buy through our links. How we handle supplied products →
There’s something quietly satisfying about making your own beef jerky. It takes patience — a long marinade, a slow dehydrator run — but the result is genuinely better than anything in a packet: properly seasoned, with a texture you actually control, and none of the mystery ingredients that tend to appear on commercial jerky labels. It’s worth making in batches when there’s a good piece of topside at the supermarket.
It’s also much cheaper per gram than shop-bought jerky, which helps. A kilogram of beef makes roughly 400 g of jerky — that sounds like a lot of shrinkage, but the flavour concentrates with it, and the shelf life makes a big batch well worth the effort.
Some of the links below are affiliate links: if you buy through them we may earn a small commission at no extra cost to you. As an Amazon Associate I earn from qualifying purchases. We only suggest things we would recommend to a friend — see our affiliate disclosure and how we research.
✉ Join the Dispatch — a calm weekly note, every Thursday. Free.
Disclosure: This post contains affiliate links. If you buy through them, I may earn a small commission at no extra cost to you. I only include products I’d genuinely consider using.
What cut of beef works best for jerky?
The key is lean beef with as little fat as possible — fat doesn’t dry well and will go rancid faster, which shortens shelf life considerably. In the UK, topside and silverside are the two cuts I’d reach for first. Both are widely available at supermarkets and butchers, reasonably priced, and have a tight grain that slices cleanly against or with the grain depending on the texture you want.
Slicing against the grain gives a more tender, breakable jerky — easier to eat, especially if you’re not used to the chew. Slicing with the grain gives a chewier, more traditional strip that holds its shape well. For a snackable result, slice against the grain.
Aim for slices around 4–5 mm thick. Thinner than that and they’ll over-dry and turn brittle; much thicker and the centre will take too long to dry safely. A mandoline makes consistent slicing much easier than a knife alone — worth having for this kind of job. If you’re cutting by hand, put the beef in the freezer for 30–45 minutes first so it firms up and slices more evenly.
For equipment, a reliable food dehydrator makes all the difference — see our guide to the best food dehydrators UK if you’re still deciding which one to get.
The marinade
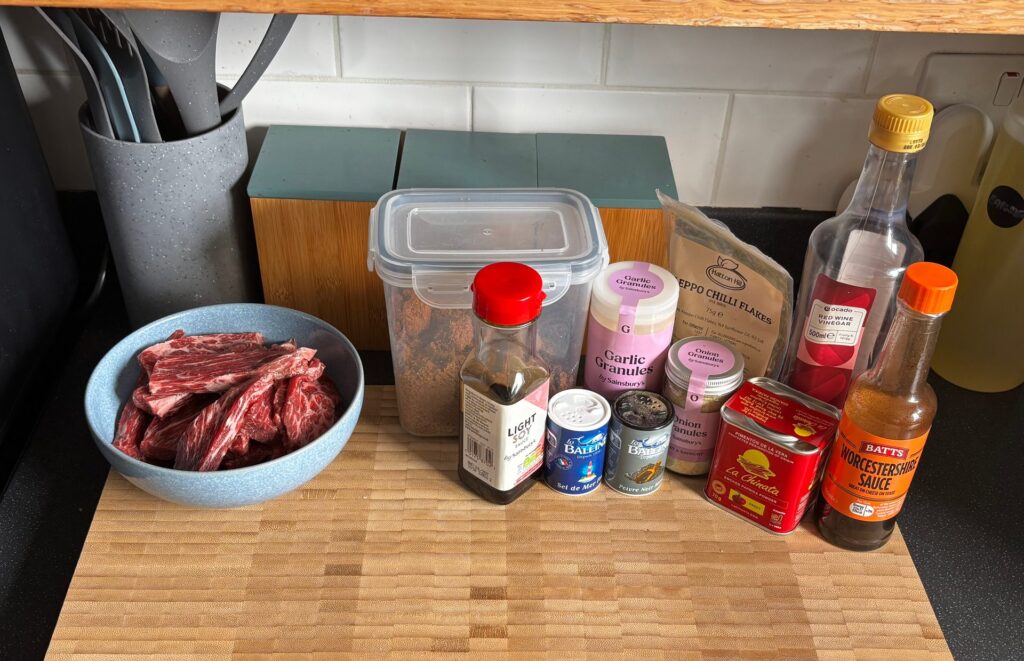
Jerky marinades are endlessly adaptable, but the base is almost always soy sauce for salt and depth, something acidic to help with preservation, and a combination of spices. This version is not too sweet, with a gentle heat from the smoked paprika and black pepper that develops as the jerky dries.
For around 500 g of raw beef slices:
- 4 tbsp soy sauce
- 2 tbsp Worcestershire sauce
- 1 tbsp apple cider vinegar or red wine vinegar
- 1 tsp smoked paprika
- 1 tsp garlic powder (or 2 cloves, minced)
- ½ tsp onion powder
- ½ tsp fine black pepper
- ½ tsp brown sugar (optional, rounds the flavour)
- Pinch of chilli flakes if you want a bit of heat
Mix the marinade, add the beef slices, and leave to marinate in the fridge for at least 4 hours — ideally overnight. The longer it goes, the more thoroughly the flavour penetrates. Turn the bag or container once or twice if you can.
Homemade Beef Jerky
A straightforward dehydrator jerky with a savoury soy and Worcestershire marinade — lean, well-seasoned, and far better than anything from a packet.
Ingredients
- Topside or silverside beef, thinly sliced500 g
- Soy sauce4 tbsp
- Worcestershire sauce2 tbsp
- Apple cider or red wine vinegar1 tbsp
- Smoked paprika1 tsp
- Garlic powder1 tsp
- Onion powder½ tsp
- Fine black pepper½ tsp
- Brown sugar (optional)½ tsp
- Chilli flakes (optional)Pinch
Method
- Trim any visible fat from the beef. Slice to 4–5 mm thickness against the grain for a tender result, or with the grain for a chewier strip. Chilling the beef in the freezer for 30 minutes beforehand makes slicing easier.
- Combine all the marinade ingredients in a bowl or zip-lock bag and mix well. Add the beef slices, ensuring they’re fully coated. Seal and refrigerate for at least 4 hours, ideally overnight.
- When ready to dry, remove the beef from the marinade and pat each slice dry with kitchen paper. This removes surface moisture and speeds up the dehydrating process.
- Arrange slices in a single layer on dehydrator trays, leaving a small gap between each piece for airflow. Do not overlap.
- Dehydrate at 70°C (160°F) for 4–6 hours. Begin checking at the 4-hour mark. Jerky is ready when it bends without breaking and shows no soft or moist spots. It should feel leathery, not brittle.
- Heat step: spread the dried strips on a baking tray, close together but not overlapping, and heat them for 10 minutes in an oven preheated to 135°C (275°F). Don’t turn it down for a fan oven. This is the safety step: the dehydrator’s 70°C is the temperature of the air, not of the meat (see the note on temperature below).
- Allow to cool completely on a wire rack before storing. Store in an airtight container or vacuum bag at room temperature for up to 2 weeks, or refrigerate for up to a month.
How much jerky does 500 g of beef make?
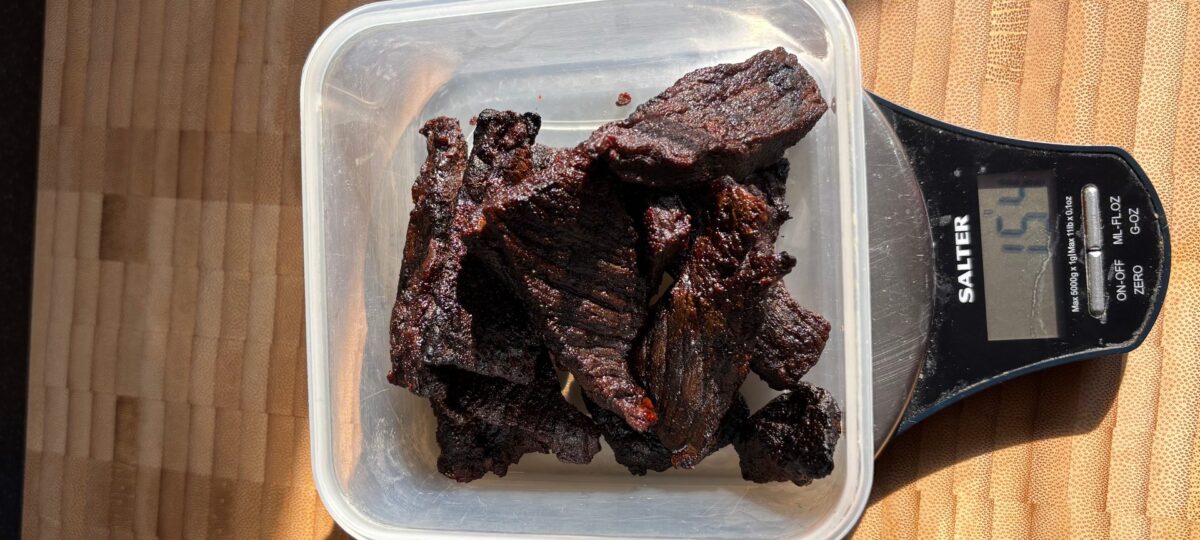
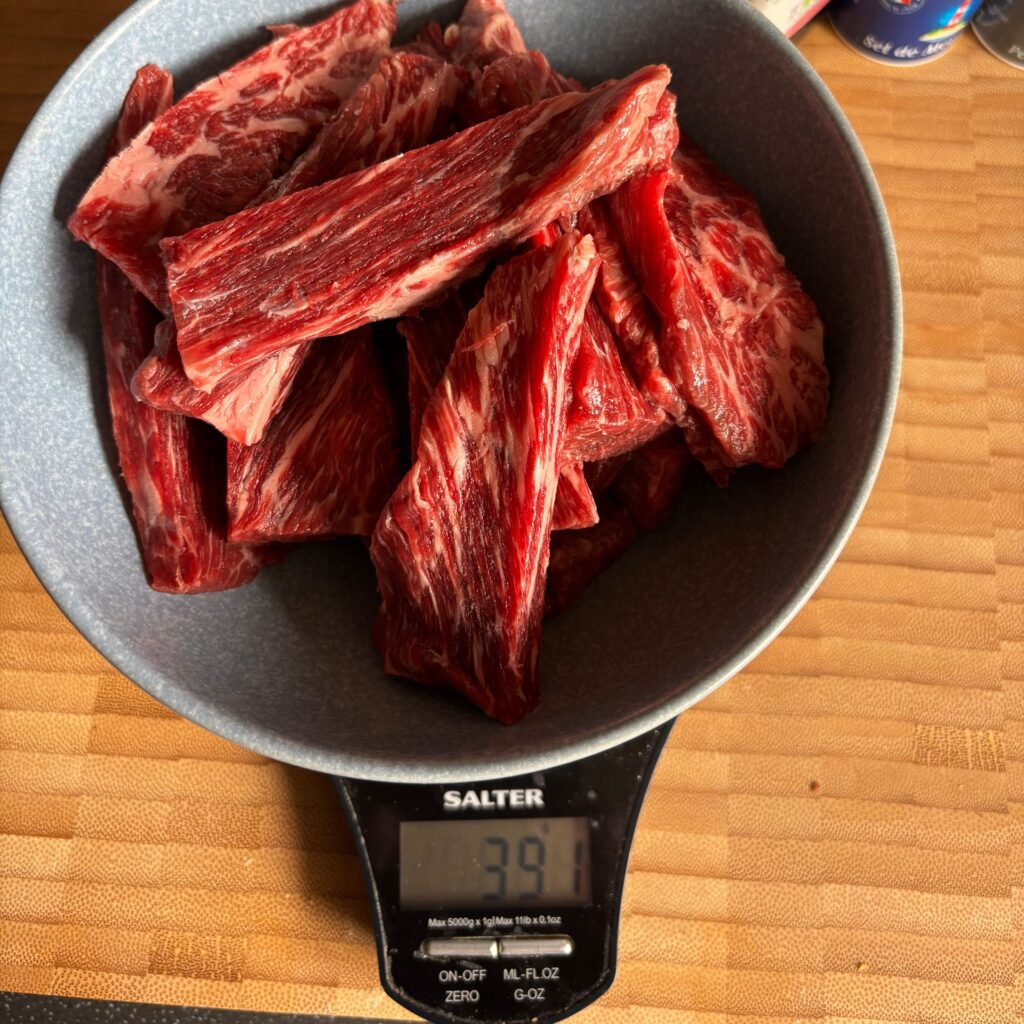
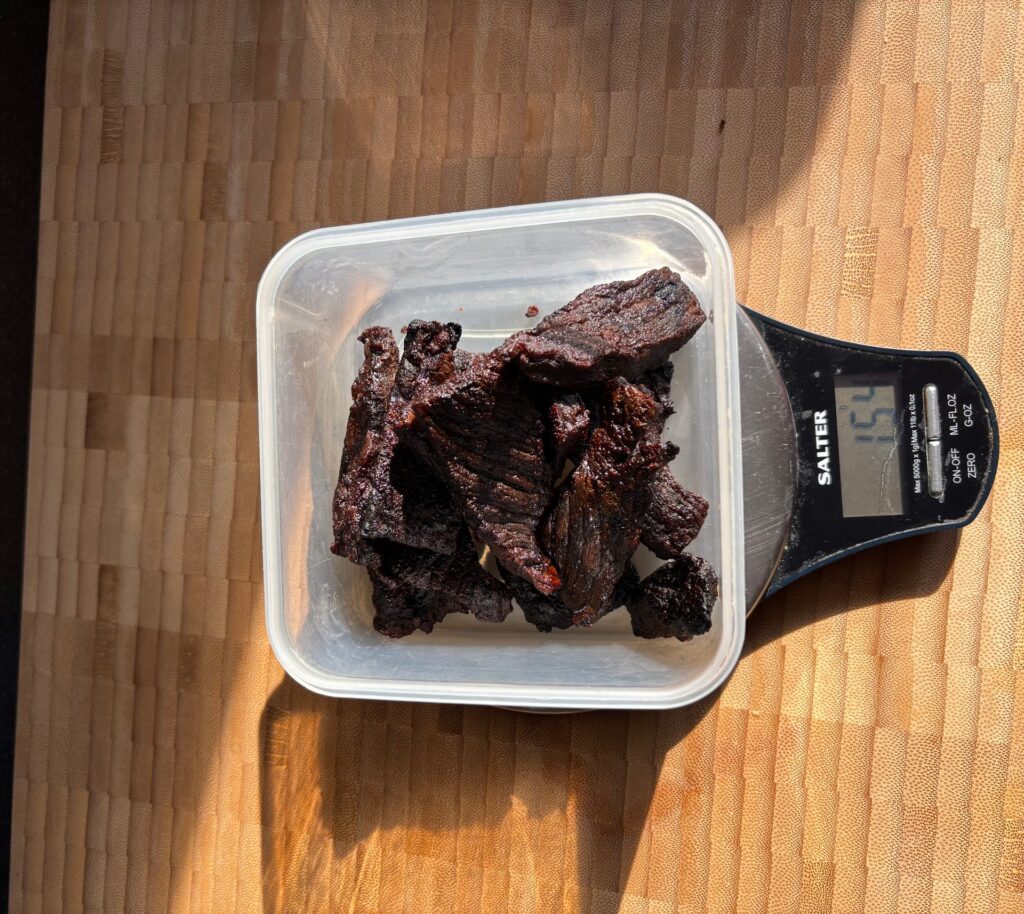
About 200 g. Drying takes out most of the water, so you end up with a little under 40% of the raw weight. My batch on 28 September went from 391 g of sliced beef to 155 g of jerky the next morning, so a kilogram makes roughly 400 g.
Making beef jerky in an air fryer
If your air fryer has a Dry setting that goes down to 70°C, it will make jerky too. I made my 28 September batch in the Cosori Double Stack, a two-drawer air fryer that VeSync, the company behind Cosori, sent me free of charge to review. I earn a commission if you buy one through the link at the end of this section, and my full review of the Cosori Double Stack covers everyday cooking in it.
The prep is the same as the main method: slice, marinate for at least four hours, and pat the strips dry. Then lay them in a single layer across the drawers, with a little space between them.
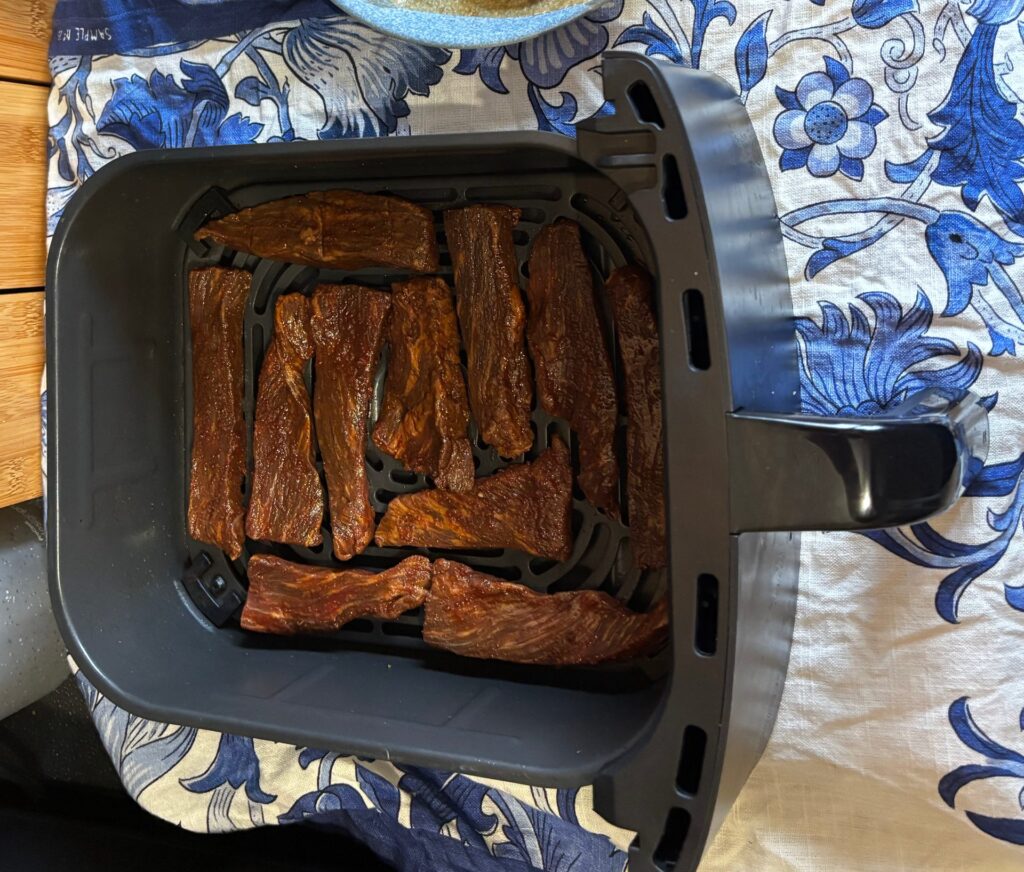
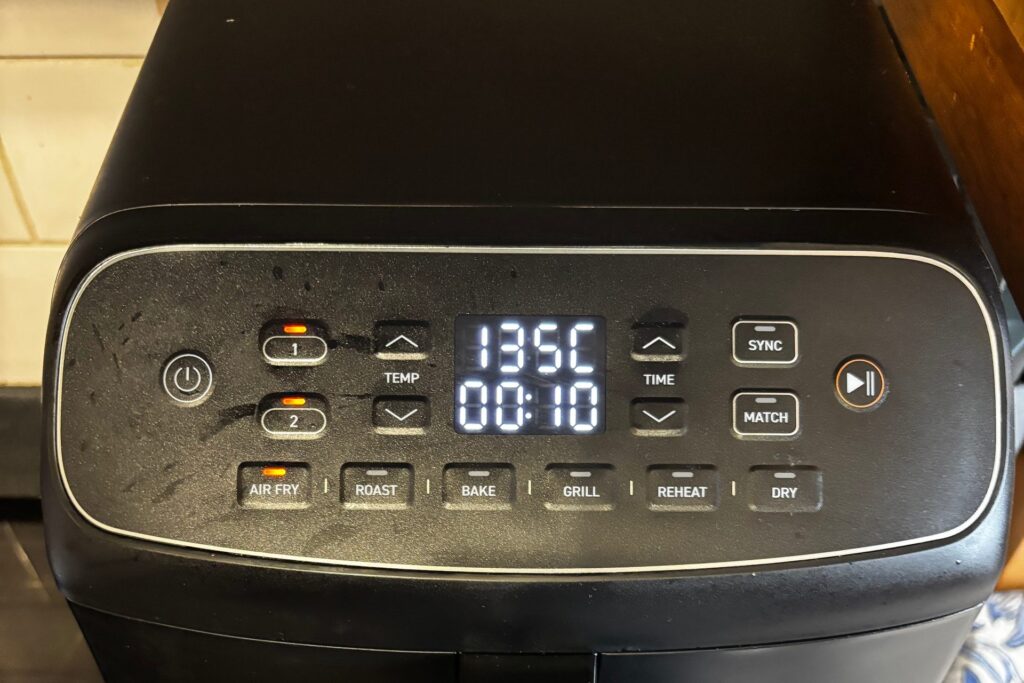
Heat the strips first. I gave both drawers 10 minutes on Air Fry at 135°C before switching to the Dry setting. Like a dehydrator’s dial, the Dry setting shows the temperature of the air, not of the meat, so the heat step matters just as much here (see the note on temperature below).
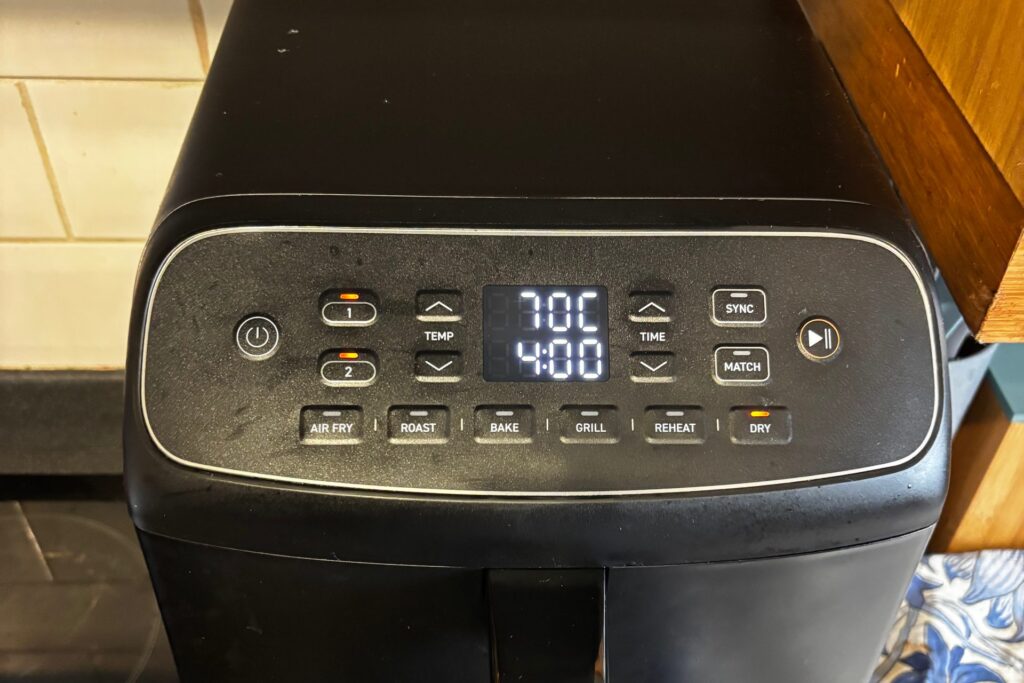
Then dry at 70°C. I set Dry to 70°C for four hours. Check the strips with the bend test from the main method.
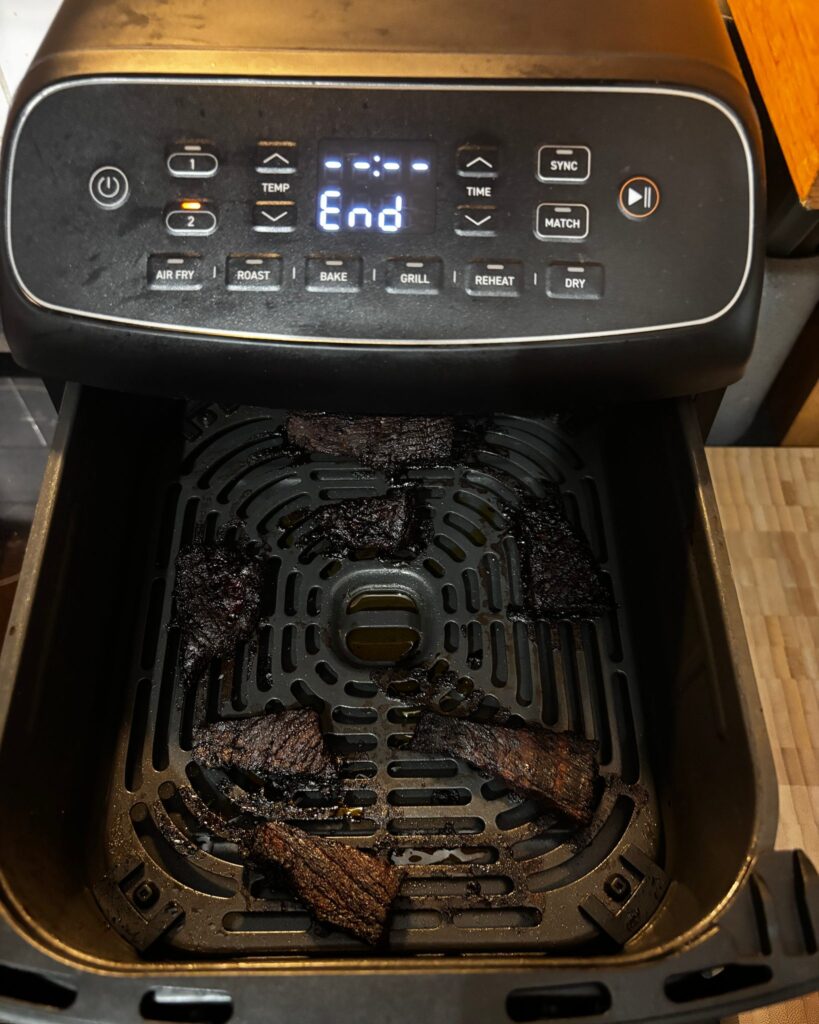
Move them into one drawer once they shrink. After four hours the strips had shrunk enough to fit in a single drawer, so I moved them all into one and gave them another two hours on Dry: six hours in all.
If drying is the main thing you want a machine for, a dehydrator still takes a bigger batch in one go; our guide to the best food dehydrators is the place to start.

Cosori Double Stack Air Fryer 8.6L
Equipment you’ll need
You don’t need a great deal of kit to make good jerky, but the right pieces make the process noticeably easier.
Food dehydrator. This is the main piece of kit. A dehydrator gives you consistent low heat across all the trays, which is what safe, even jerky requires. See our full guide to the best food dehydrators UK for recommendations at different price points. If you’re buying for the first time, a mid-range model with adjustable temperature and a horizontal airflow system will serve you well for jerky and much more besides.
Browse food dehydrators on Amazon UK
Mandoline slicer. Not strictly essential, but enormously helpful for getting consistently thin, even slices. Consistent thickness means consistent drying time — without it, you’ll find some pieces done while others still have soft spots. Use the hand guard, always.
Browse mandoline slicers on Amazon UK
Soy sauce. Worth having a larger bottle on hand if you make jerky regularly — it goes into the marinade in useful quantities and the flavour difference between a decent soy sauce and a poor one is noticeable.
View Kikkoman Soy Sauce on Amazon UK
Storage bags or airtight containers. Once dried, jerky needs to be stored properly. Zip-lock bags work well; vacuum-seal bags are even better if you have a sealer, as they significantly extend shelf life and make the jerky easier to pack for trips.
Browse vacuum food storage bags on Amazon UK
Tips for consistent results
Pat the slices dry before dehydrating. Surface moisture from the marinade slows the drying and can lead to uneven results. A few minutes with kitchen paper makes a real difference.
Don’t overcrowd the trays. Slices need airflow all around them. Overlapping pieces will dry unevenly and can take significantly longer. If you have more beef than trays, work in batches.
The bend test. This is the most reliable way to check doneness. Take a cooled piece and bend it — it should flex and potentially crack the surface slightly, but not snap in half (over-dried) and not feel soft or yielding in the centre (under-dried). A leathery, pliable strip is what you’re after.
Temperature matters for safety, and the dial isn’t the meat. Dry at 70°C, but don’t rely on the setting alone. While the strips are still wet, evaporation keeps them cooler than the air around them, and bacteria get harder to kill as the meat dries out. That’s why the method has a heat step. The US National Center for Home Food Preservation gives two ways to do it: heat the dried strips for 10 minutes in an oven preheated to 135°C (for strips cut 6 mm thick or less), or bring the raw strips to the boil in their marinade and boil them for 5 minutes before drying.
Marinating time. Four hours is the minimum for any real flavour penetration; overnight is genuinely better. The acid in the marinade also has a mild tenderising effect on the fibres, which helps the texture of the finished jerky.
How long does homemade beef jerky keep?
Properly dried and stored jerky will keep for around 1–2 weeks at room temperature in an airtight container, away from direct light and heat. In the fridge it’ll last a month, and in the freezer considerably longer — up to 6 months without any real loss in quality. The key markers that jerky has gone off are visible mould, any tacky or slimy texture, or an off smell. If in any doubt, discard it.
Commercial jerky contains preservatives that extend its shelf life well beyond homemade — that’s one reason to expect a shorter window from your own batches. The trade-off is knowing exactly what went into it, and it usually doesn’t hang around long enough for shelf life to be a concern anyway.
If you enjoy making your own preserved meat, you might also want to try a batch of homemade biltong — the South African equivalent that uses a vinegar cure and air-drying rather than a marinade, with a quite different (and very good) result.
You might also find our guide to Hearty Beef Stew with Root Veggies (Slow Cooker) useful.
🛡 Our standards: How we research · Editorial policy · Affiliate disclosure · Corrections

About Gareth
Gareth Isherwood is the editor of Danbury & Lovejoy. He has baked bread at home for 25+ years and has 15 years of growing experience across gardens, containers and other growing spaces, including an East Sussex allotment for the past three years. Read his full story →
For per-food temperatures and times beyond this method, the dehydrator temperature & time guide is the reference chart used across the whole cluster.
Was this useful?