
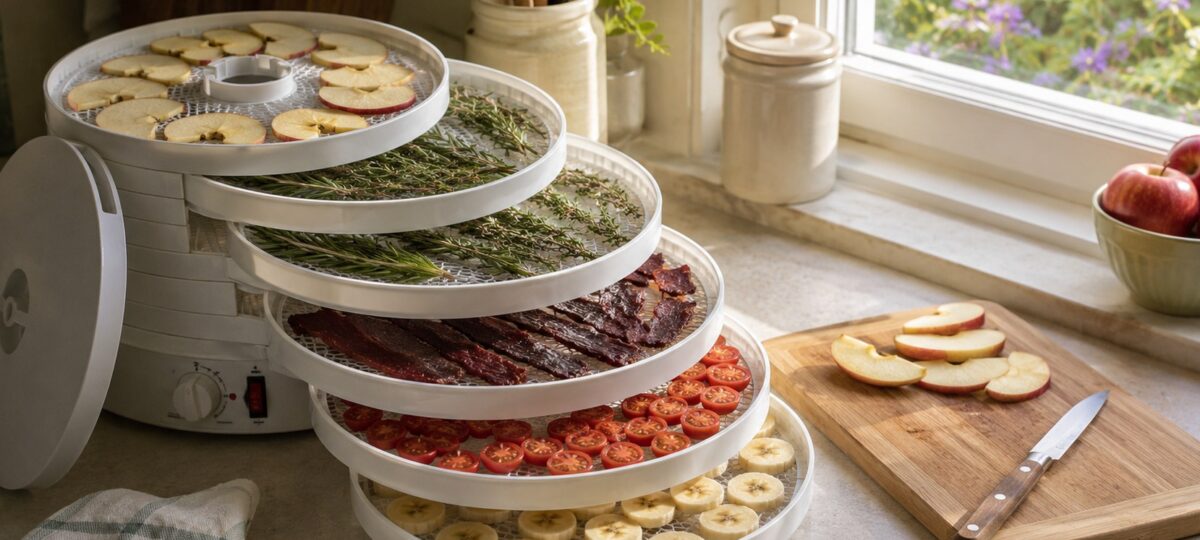
After fifteen years growing my own fruit and veg — the last three on a Sussex allotment — the single most useful kitchen-table reference for anyone preserving a glut in a dehydrator is a temperature chart. The wrong setting either case-hardens food (sealed outside, wet inside) or robs it of colour and nutrients. The right one is dull and unglamorous: low and slow, the right airflow, and patience.
This chart is set out by food group, with starting times for a household dehydrator at UK kitchen humidity (which is usually higher than the American forums assume). Treat them as a starting point: every machine and every batch runs a little differently.
How dehydrator temperatures actually work
A food dehydrator removes water by moving warm air across food at a controlled temperature. The temperature isn’t cooking — it’s evaporating water faster than the food can spoil. Three things matter:
- The setting on the dial — what the heating element is targeting
- The real internal temperature of the chamber — often 3–5°C lower than the dial on budget models
- The food’s surface temperature — what actually matters for drying speed
Cheaper dehydrators run hotter than they say. If you’re new to yours, set it 5°C below your target for the first batch and check after the minimum time. You can always add an hour. You can’t unsear a piece of jerky.
For a longer write-up on the models worth buying, the airflow patterns, and the tray quality that affects drying evenness, see the best food dehydrators we’ve reviewed for UK kitchens — the round-up explains why two machines at the same wattage can take very different times for the same food.
The temperature & time table
These are starting settings for a standard 6-tray household dehydrator at typical UK indoor humidity (50–65%). Add 1–2 hours in winter when the air is drier; subtract a little in a humid August.
| Food | Temperature | Time | Notes |
|---|---|---|---|
| Herbs (basil, parsley, mint, oregano, thyme) | 35°C | 2–4 hrs | Lowest setting; preserves volatile oils |
| Hardy herbs (rosemary, bay, sage) | 40°C | 3–5 hrs | Slightly higher; tougher leaves |
| Apple rings (6mm thick) | 55°C | 6–10 hrs | Lemon-water dip stops browning |
| Pear slices | 55°C | 8–14 hrs | Higher sugar, longer drying |
| Banana slices | 55°C | 8–12 hrs | Lemon dip for colour |
| Strawberries (sliced) | 55°C | 8–14 hrs | Long but easy; keep slices even |
| Apricots / plums (halved) | 55°C | 12–24 hrs | Pit-side up, skin down |
| Mango / pineapple | 55°C | 10–14 hrs | Sticky; line trays with parchment |
| Tomatoes (halved) | 55°C | 10–16 hrs | Cut-side up; salt before drying |
| Mushrooms (sliced 5mm) | 55°C | 4–8 hrs | Don’t wash — brush clean |
| Courgettes / aubergines | 55°C | 6–10 hrs | Salt 30 min first to draw water |
| Peppers (strips) | 55°C | 6–12 hrs | Bell peppers slower than chillies |
| Chillies (whole or split) | 55°C | 8–14 hrs | Or use a paper bag at warm room temp |
| Onions / leeks | 55°C | 8–12 hrs | Outdoor extraction recommended |
| Carrots / parsnips (blanched, sliced) | 55°C | 8–12 hrs | Blanch 3 min first |
| Beetroot (blanched, sliced) | 55°C | 8–12 hrs | Stains everything; use older trays |
| Fruit leather (purée, 3mm layer) | 55°C | 6–10 hrs | Tacky-not-wet finish |
| Yoghurt (for sweets / dog treats) | 55°C | 10–14 hrs | Lined tray; turn after 6 hrs |
| Beef jerky | 70°C* | 4–8 hrs | *160°F = 71°C: USDA-recommended jerky temperature |
| Biltong (traditional method) | 30–40°C | 4–7 days | Low and slow; UK food-safety rules differ |
| Pet treats (chicken, liver, sweet potato) | 65°C | 6–10 hrs | Must hit 70°C internally at finish |
A note on jerky and biltong: jerky is dried hot, biltong cold-cured. Both work in a dehydrator but for different reasons. We’ve covered both elsewhere — our beef jerky recipe uses the hot-dry method, and our biltong guide explains the South African cold-cure tradition that doesn’t need heat at all.
How to know when something is “done”
Dehydrator timings are estimates, not instructions. The only test that matters is the squeeze test.
- Fruit: leathery, pliable, no pockets of moisture when you tear a piece in half. Cool a piece for 5 minutes first — it firms as it cools.
- Vegetables: brittle, snaps when bent. Should rattle on the tray.
- Herbs: crumble to dust between finger and thumb.
- Jerky: bends and cracks but doesn’t break. White fibres show when torn.
- Mushrooms: light, crisp, no spring back.
If you’re unsure, do another hour. Slightly over-dried food rehydrates fine. Under-dried food spoils.
Why temperature matters more than time
Two factors decide whether your food stores well or grows mould in the larder:
1. Killing surface microbes. Anything below 50°C is in a temperature range where some bacteria still multiply. For most fruit and veg this isn’t a problem because they’re acidic and the sugar concentrates as water leaves. But for meats and dairy, 70°C minimum at some stage is essential — either before drying (jerky pre-cook), at the end (a finishing oven blast), or sustained during drying.
2. Driving out enough water. Foods need to drop below 20% moisture content to store reliably without refrigeration. Herbs and brittle veg get there easily. Fruit doesn’t — high sugar holds water — which is why dried fruit is “leathery” rather than “crisp” and needs cool, dark, sealed storage.
A common mistake is dialling the temperature up to speed things up. The outside dries faster than the inside, the surface forms a skin (case-hardening), and the inside stays damp. Drop the temperature, accept the longer drying time, and rotate trays once or twice if your dehydrator has hot spots.
Storage after drying
Dried food keeps if it’s properly dry, properly sealed, and properly stored. Three rules:
- Conditioning: after drying, pack into a loose jar for 5–7 days. Shake daily. If you see any moisture beads on the glass, the food isn’t dry — return it to the dehydrator for another 2–3 hours.
- Sealed storage: airtight jars in a dark cupboard. Vacuum bags double the storage time but aren’t essential.
- Shelf life: herbs 1 year; veg 6–12 months; fruit 6–12 months; jerky 1–2 months at room temp, 6 months refrigerated; mushrooms 1 year.
Cool, dark, dry. Three words, three rules.
Quick troubleshooting
- Food drying unevenly: rotate the trays at the halfway point. Cheap dehydrators have one hot tray (usually nearest the fan).
- Surface tacky after the full time: humidity in your kitchen was higher than expected. Give it another 1–2 hours.
- Case-hardened (hard outside, wet inside): temperature was too high. Drop 5°C next time.
- Smells of the previous batch: onions and garlic flavour everything. Run a 30-minute empty cycle at 70°C, or do strong-smelling foods in batches.
- Slow drying: tray overcrowded or pieces cut unevenly. Spread pieces out so air moves around each one.
What to dry first
If you’ve just bought a dehydrator and you’re not sure where to start, the easiest first batches — the ones that build confidence and give a quick win — are herbs from the garden in summer, apple rings from autumn windfalls, and a tray of sliced mushrooms. None take more than half a day. All store for months. We’ve written method posts for the main ones — work through them as the season suits.
For the equipment itself — what to buy, what to avoid, and what’s worth the extra money — our 2026 UK food-dehydrator round-up reviews five models from £40 to £180.
A dehydrator is one of those tools that earns its keep slowly. The first batch of dried apples doesn’t justify the worktop space. The third winter of opening jars of dried tomatoes, mushrooms and herb stalks from last August’s glut — that does.
Was this useful?