Garden & Growing · Allotment & Outdoor Life
A shed is one of those garden investments that quietly transforms everyday life: tools stop cluttering the hallway, bikes find a proper home, and all the accumulated “outdoor bits” finally have somewhere dry. The trick is choosing a shed that fits your space and your real life — without buying too small (the classic regret) or commissioning a full workshop when you simply need organised storage.
Some of the links below are affiliate links: if you buy through them we may earn a small commission at no extra cost to you. As an Amazon Associate I earn from qualifying purchases. We only suggest things we would recommend to a friend — see our affiliate disclosure and how we research.
✉ Join the Dispatch — a calm weekly note, every Thursday. Free.
I’ve been growing my own for over 15 years — the last three on an allotment near the East Sussex coast, where my shed is a timber 6×4. What follows walks you through size, materials, and bases in a calm, sensible order, with practical rules you can apply in five minutes.
Start by browsing live ranges to see current prices (timber, overlap, shiplap, premium sizes) here:
Quick answer: the shed choice that suits most UK gardens
- Best-for-most size: 8×6 (room for real storage, not just “a few bits”).
- Best-for-most material: timber shiplap (tidy look, good everyday weathering).
- Best-for-most base: a proper, level base (concrete slabs or a sturdy shed base kit).
If you’re choosing between 6×4, 7×5 and 8×6, use your visual guide first: Shed size guide (UK): what fits in 6×4, 7×5 & 8×6.
Step 1: Choose your shed size (without regret)
Most shed regret comes from underestimating how quickly a shed fills. A mower, spade, compost bags, folding chairs, paint tins, birdseed, kids’ bikes… it adds up fast. A 6×4 fills up fast — add a mower and you’re soon squeezing past it to reach anything at the back. Going one size up is almost always the right call.
Use this simple “what’s going in?” test
- Mostly tools + a mower: 6×4 can work — but be honest about how much you accumulate.
- Tools + chairs + bikes occasionally: 7×5 is a good middle ground.
- Tools + bikes + proper storage + “I want space to move”: 8×6 is the sweet spot.
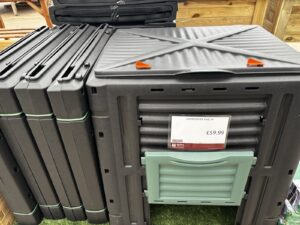
Rule of thumb: if you’re between sizes, go one step bigger. You’ll rarely regret the extra breathing room — but you will regret cramped. If you’re also planning a compost bin nearby, factor that footprint into your garden layout at the same time — it’s much easier to plan both together.
Helpful companion: Top 5 garden sheds (UK): editor’s picks.
Step 2: Choose a shed material (timber vs metal vs resin)
Material is about how you want the shed to behave over time: looks, maintenance, longevity, and how “solid” it feels day to day. Each has genuine strengths — and genuine drawbacks worth knowing before you commit.
Timber (classic, looks right in UK gardens)
- Pros: warm look, blends into most gardens, can be painted or stained, easy to customise with shelves and hooks.
- Cons: needs treatment every year or two — especially near the coast or in a damp climate, where untreated timber softens faster than you’d expect. Budget an hour each autumn and it’ll last well.
- Best for: most gardens, especially where the shed is visible from the house and you want it to feel like part of the space.
On an exposed coastal plot, a timber shed wants treating each autumn before the wet season sets in, and with that basic annual care it holds up well for years. On a site like that, choose shiplap or tongue-and-groove cladding rather than overlap: the gaps in overlap boards let in driving rain.
Metal (low fuss, security-forward)
- Pros: very low maintenance, solid and secure feel, resistant to rot.
- Cons: can feel cold and echoey inside; condensation forms on the inside walls in damp weather; in summer it gets hot quickly. Not a comfortable working space — better suited to storage you don’t need to spend time inside.
- Best for: hidden side returns, security-focused storage, or anywhere you want zero maintenance.
Resin / plastic (tidy, easy upkeep)
- Pros: minimal maintenance, clean appearance, often quicker to assemble than timber.
- Cons: lacks the “workshop” feel of timber; quality varies significantly between brands — cheap resin can fade, warp or crack after a few years of UV exposure.
- Best for: simple storage where you want a clean, no-paint solution and a tidier look than timber allows.
If you’re leaning towards timber and want to understand the difference between cladding grades, this is worth reading: Overlap vs shiplap vs tongue & groove (UK).
Step 3: The shed base (the part that actually decides how long it lasts)
A shed base isn’t glamorous, but it’s the foundation of everything — literally. When a shed is lost to a rotten floor or a sticking door, a poorly prepared base is almost always the cause. A wobbly or uneven base leads to:
- doors that don’t close properly — and get steadily worse over winter
- water pooling at the edges and wicking up into the floor
- wear and warping over time that can’t easily be reversed
Take the time to get the base right before the shed arrives. It’s a few hours of effort that saves years of frustration. If your garden has chalky or stony soil, do some extra levelling work first — chalk drains well but can shift under a heavy load if not compacted properly.
Concrete slab or paving slabs (classic, solid)
Best for a long-term permanent base. It’s more effort up front but stays level over the years and gives the shed the most stable platform possible. If you’re putting in an 8×6 or larger, this is the one to choose.
Treated timber base frame (traditional)
A treated timber frame works well if it’s properly level and slightly raised from the ground to allow drainage. The critical thing is keeping it square — an out-of-square frame means the shed walls go up at a twist and the door will bind from day one.
Shed base kit (low-fuss)
A good option if you want a defined platform without mixing concrete. Even with a base kit, take care to level the site first — the kit won’t compensate for lumpy ground. A spirit level and a few hours of prep makes all the difference.
For base tools that make the job less fraught:
What to spend
As a rough guide, a basic timber overlap shed in the 6×4 to 7×5 range sits at the budget end of the market, and a decent shiplap or tongue-and-groove shed of the same size typically costs noticeably more — usually money well spent on an exposed or wet site. Above that you’re into premium builds with thicker cladding, better fittings and longer guarantees. Prices move with timber costs and the season, so compare like-for-like sizes and cladding on the day you buy.
The headline price is rarely the whole cost. Add the base, wood treatment for a timber shed, and delivery: many suppliers charge separately for delivery, and some for assembly.
Before you order: practical notes
- Measure the access route. Check the panels will get through every gate and passage on the way to the site — a 6ft panel won’t turn a right-angled corner in a narrow side return. This catches out more people than anything else.
- Have the base ready first. Preparing a base with a flat-pack shed lying on the lawn is far harder than doing it before delivery.
- Pent or apex roof? A pent roof (a single slope) throws water off the back and gives full headroom at the door, which suits a shed pushed against a fence or wall. An apex gives more height down the middle but needs clearance on both sides.
- Stand in one if you can. Headroom and door width are the two things people regret, and neither is obvious from the dimensions; a garden centre with display sheds settles both.
- Spring is the busy season. Order early if you want the shed up and in use for the growing season.
Shop shed ranges (live prices & availability)
Deals and delivery windows change often. These links take you to live ranges so you can browse what’s available right now.
Frequently asked questions
What size shed do most UK gardens need?
An 8×6 is the sweet spot for most UK gardens. It comfortably holds a mower, tools, bikes, and seasonal storage with room to move. Many people buy a 6×4 and regret it within a year — going one size larger almost always pays off.
How often does a timber shed need treating?
Once a year is ideal, but every other year with a good quality preservative is fine if you keep on top of it. Autumn is the best time — treat before the wet season, not after. Pay particular attention to the floor edges and any joints where water can sit.
Do I need planning permission for a shed in the UK?
Most garden sheds fall under Permitted Development and don’t need planning permission, provided they’re single-storey, no more than 2.5m tall overall if within 2m of a boundary, and not forward of the principal elevation. Always check with your local authority if you’re unsure — rules differ slightly in conservation areas and listed buildings.
What’s the best base for a garden shed in the UK?
Concrete slabs or paving slabs are the most stable long-term option. Shed base kits work well for smaller sheds if the ground is properly levelled first. The key is that it’s level, solid, and slightly raised so water can’t pool beneath the floor.
Related reading
📋 From the D&L Shop: Planning your growing year? Our Your First Year on the Allotment guide covers every month from clearing the plot to your first proper harvest — written from 15+ years of UK growing experience. £9.99, instant PDF download. Also useful: the Allotment Plot Planner (£4.99) for mapping beds and planning crop rotation. Browse the full shop →
Shed-internal storage is a different problem than house storage — but our small-home round-up covers the stackable boxes and hooks that work in both.
🛡 Our standards: How we research · Editorial policy · Affiliate disclosure · Corrections · Last reviewed: July 2026

About Gareth
Gareth Isherwood is the editor of Danbury & Lovejoy. He has baked bread at home for 25+ years and has 15 years of growing experience across gardens, containers and other growing spaces, including an East Sussex allotment for the past three years. Read his full story →
Was this useful?